How it works
Four moves to captions
Open Caption Suite inside your editor, and stay there until the captions are on the timeline.
Demo
See it work. Start to finish.
The real panel, recorded inside the Adobe apps. Choose a chapter, or let it play.
Recorded in After Effects
In Premiere Pro
First, transcribe.
Choose the clip or the whole sequence, a language (or auto-detect) and press Transcribe. The speech model runs on your computer.
Then fix what it misheard.
Every caption has its start and end time. Change a word and the timing stays; split, join or nudge a caption.
Then pick a look.
Choose a style, the font, colours, outline and position. The preview plays your own words.
Then add them to the timeline.
Pick an animation and press Add. The captions land on your timeline, each one still editable.
And there they are.
One Motion Graphics template per caption, above your footage, each with its text, style and animation in Premiere’s Properties panel.
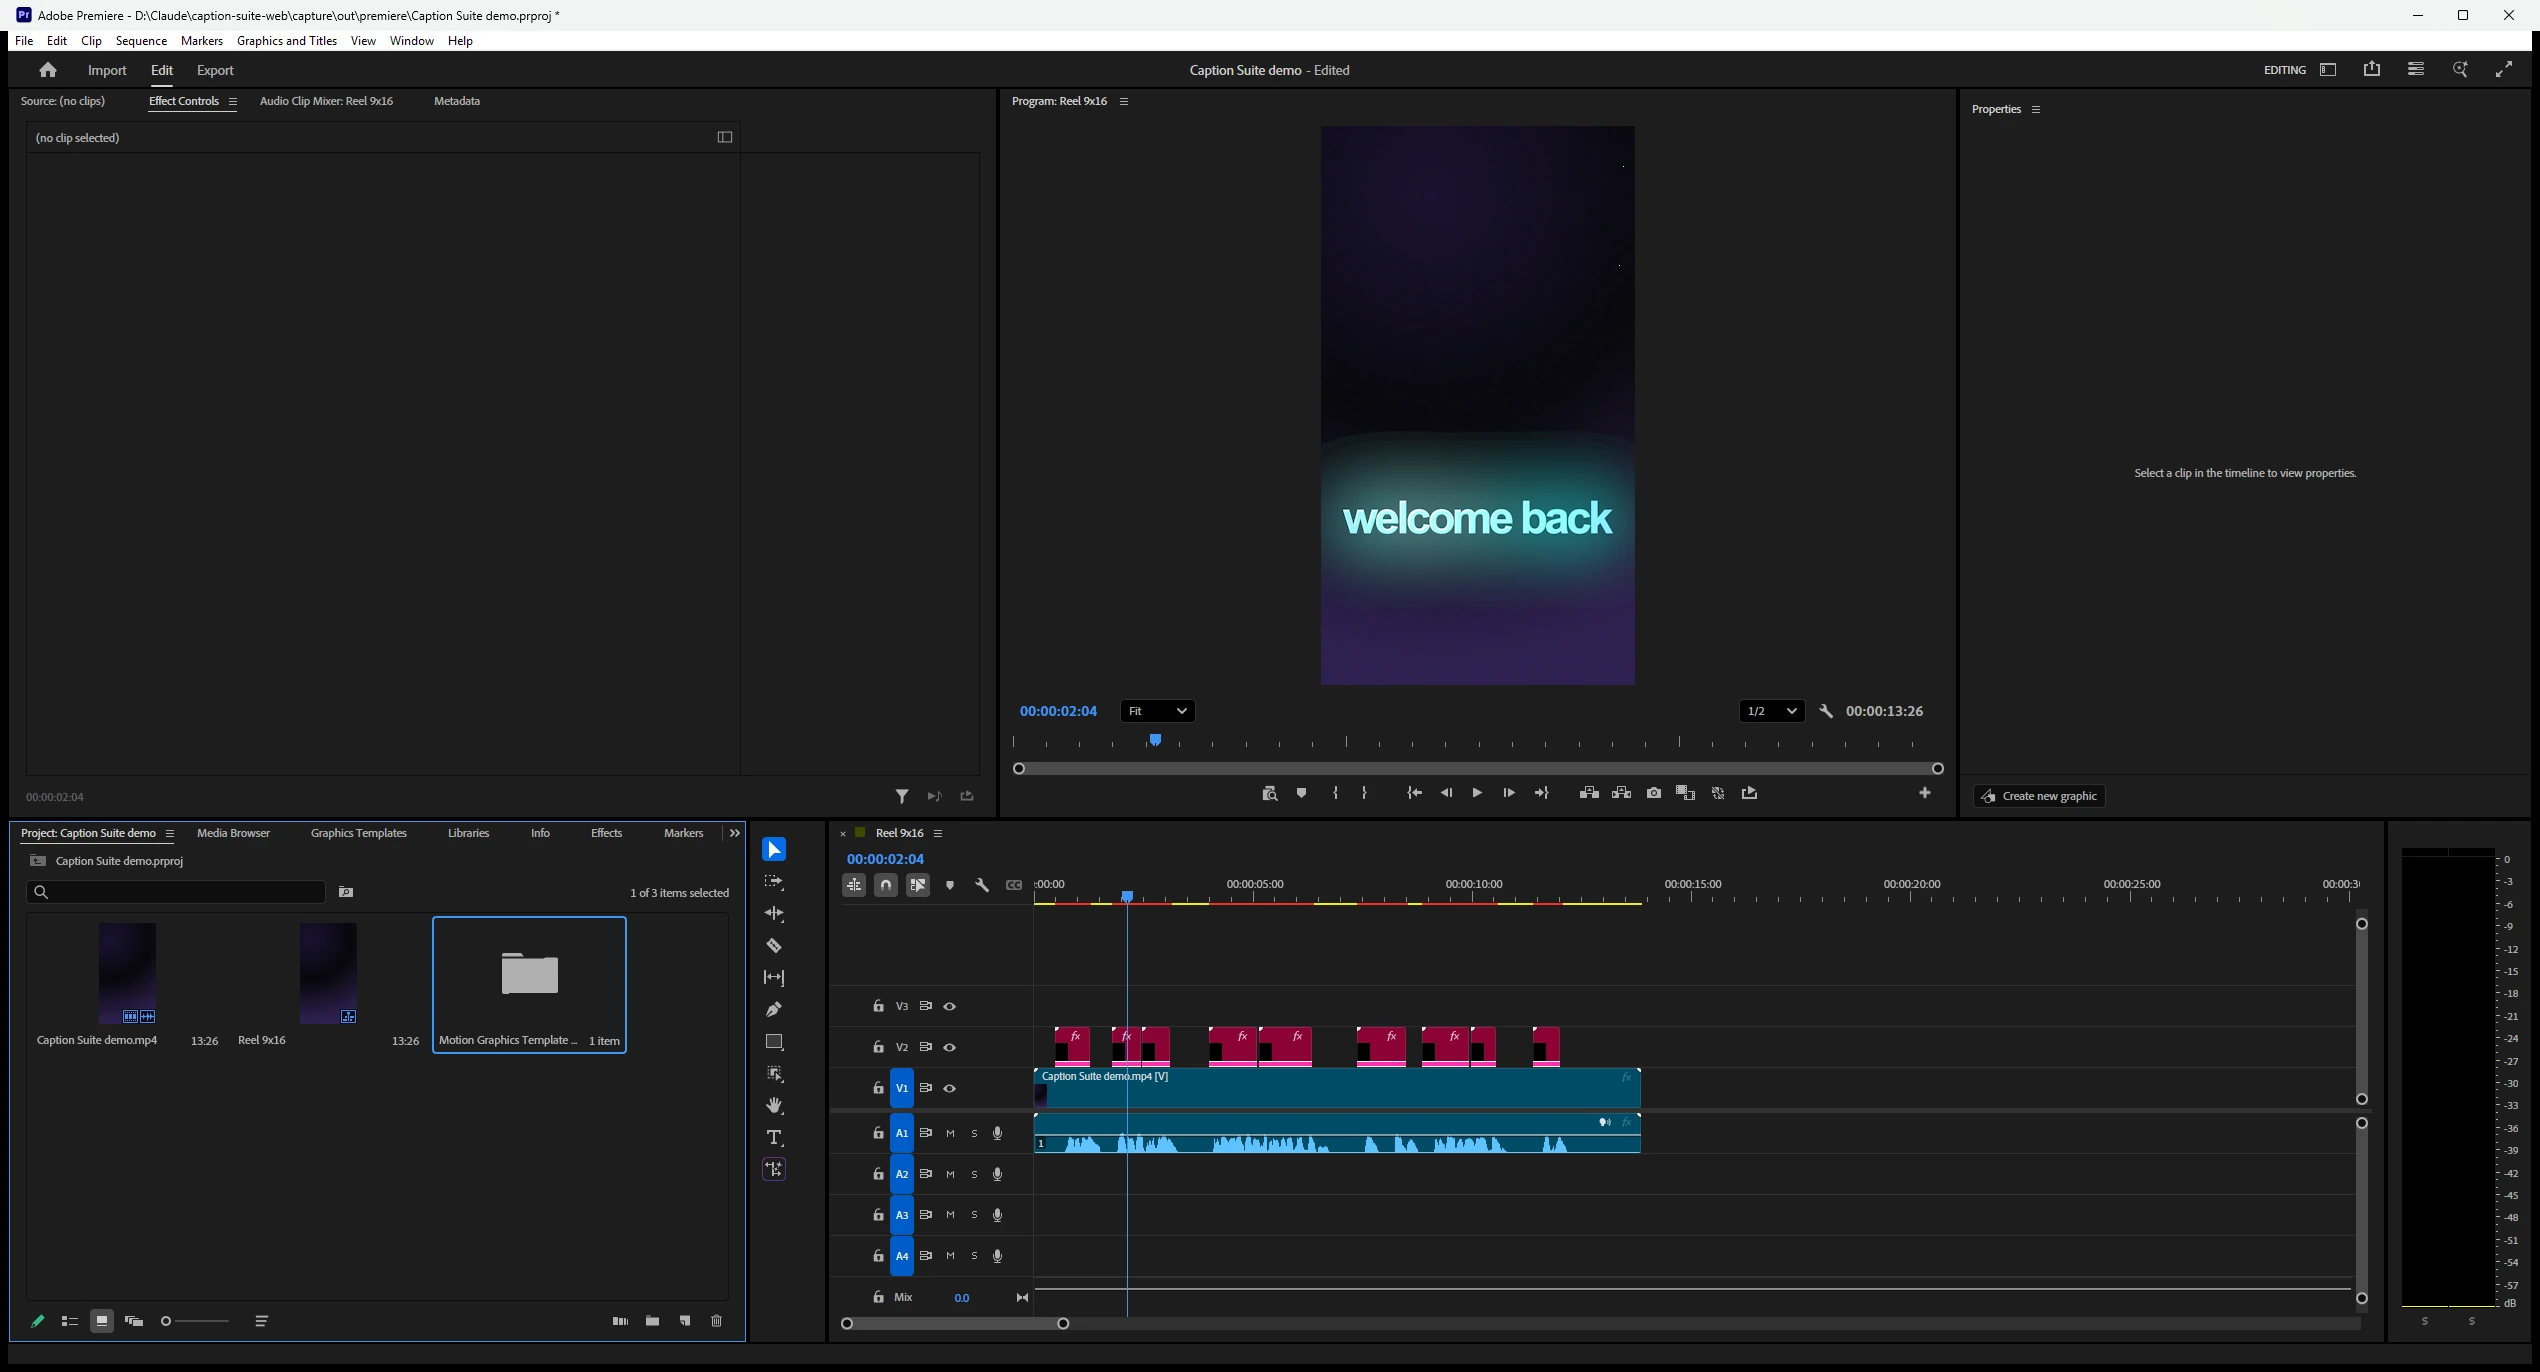
In After Effects
Tick one or more compositions, transcribe them in turn, and add the captions as text layers with the animation applied. Each composition keeps its own captions and adjustments.
In DaVinci Resolve Studio
Open Workspace › Workflow Integrations › Caption Suite. The same steps run in their own window; the captions arrive on a new track as Text+ titles you edit in the Inspector, or as a native subtitle track.
Before the first caption
- Install
- Run one installer for all three editors
- Activate
- Paste the key from your email once per computer
- Open in After Effects or Premiere Pro
- Window › Extensions › Caption Suite
- Open in DaVinci Resolve
- Workspace › Workflow Integrations › Caption Suite
Spend less time on captions. More time creating.
Bring Caption Suite into your editing workflow.